Wednesday, March 16, 2011

Week 3

This week has been interesting. Ive had a few visitors to my garden from my niece and nephew to snails to a misterious plant eater. These are the photos from this week and how much the plants have grown.

Box 1

The capsicum are probably the worst box out of them all. There are only a couple of plants growing as they should and only one other that hasn't died.


This is the biggest of them and it looks like a happy little seedling, but only a seedling still. The ones that got eaten by snails last week are now brown twigs.

Box 2

The lettuces are doing well and you can hardly see the soil beneath them which is great. They grew alot quicker then I thought they would.
These are the cherry tomatoes. They have grown alot, and I found some suprises when I looked throught them.


I found a number of little fruits! I don't know if the different colours mean that some are further in their development or that they are going to ripen in different colours (from different trees), but thats part of the suprise.

Box 3
My peas are slowly getting there... they aren't the best box but their still working on getting back to life. In saying that I do not actually know what they are meant to look like like I do with lettuces, tomatoes and beetroot.

Box 4

These tomatoes are doing well too, but no fruits to report just yet. I've put stakes in for the taller ones to grow on, I just need to attatch them. Even though they don't have fruit yet they do have lots of flowers which is a very encouraging sign.


Box 5

The mini cauliflowers are much bigger and you can't see much of the soil under them. This may, however, be because of overcrowding when I planted them...  woops. Something has been going around a few of my boxes and enjoying my plants before I can. You can see, in the bottom left corner, that there is quite a bit of the leaf missing, and it is like that through a few of these plants.

Box 6

My chives are doing well.... but I really do need to go into their own pot, they are starting to be swamped by the beetroot.

My beetroots are growing well but once again something is eating them. I noticed that something was eating them on the beetroot before any other plant because the beetroot goes purple around the wound.

This photo was taken on Tuesday but by Wednesday, when I took the rest of the photos, the holes were much bigger. I have tryed looking for what it there but dispite my looking every day I have not found a single thing.

Box 7

My cucumbers are growing fast as well. Half the box looks empty, but they are growing over the sides of the box, something I will need to photograph for next week. As with some of my other plants, my cucumbers have had a visitor too and as a result some of the leaves have big holes in them.

Veranda Pots

My mint is growing tall and starting to smell very minty if you rub it between your fingers.


This is the mysterious herb. My sisters boyfriend (also a chef) told me that it was thyme, and not rosmery like I thought. Either way it is growing really well. I'm going to get rid of all the dead growth to give it room to grow more.


This week my niece had a look around the garden and touched everything to see what it felt like. The tomatoes and cucumber were furry but the beetroot felt nice just like the mint, although she did not like the smell of the mint at all. More on my neices garden adventures later.

Monday, March 14, 2011

Week 2

So, week one was all about planting the plants, its been a week since they were planted (pretending that I'm posting on the 9th when the photos were taken) and they're actually doing very well, for the most part.
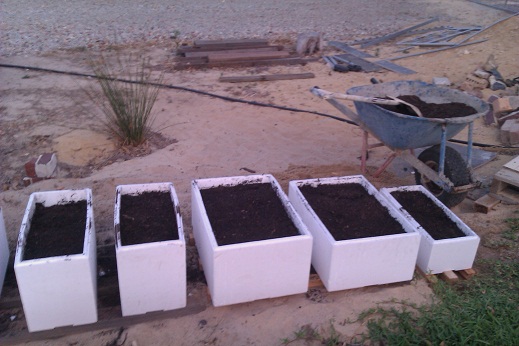
Here are my boxes:

Box 1
The capsicums have been a little bit hit and miss, but not because of me....
This is the hit, its getting tall gorgeous and green...
These couple on he other hand, are the misses. I found a little white snail in the box, which could be the only reason for half of my little capsicum plants to be turning brown and having no leaves. I guess I'll just have to check for snails every time I water them.

Box 2
My lettuces look like lettuces!! I may not eat them yet... but I bet I could!
These are my tomatoes in that box....  They've become very bushy and have that distinct tomato leaf.
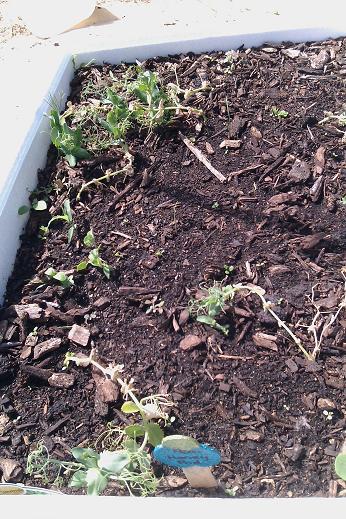
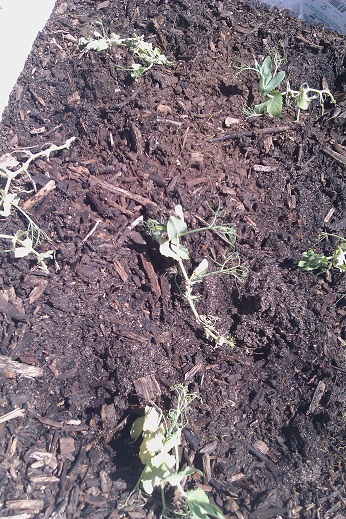
Box 3
Now this may not look so impressive, but if you think back to the little brown and wilted plants that I put into the soil...  this is a massive improvement because....
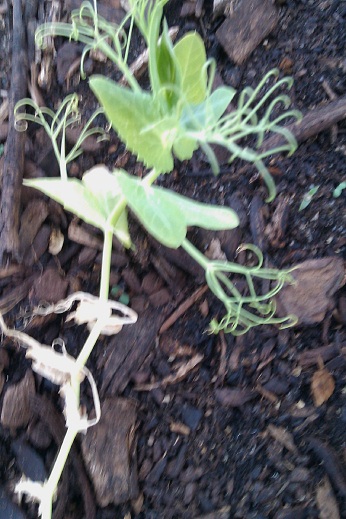
...they are alive!! Well, most of them. I think I lost one or two because they haven't come back, but I'm so pleased that these peas have come back to life.

Box 4
These are my second lot of cherry tomatoes. The pack that I go had 3 different types of cherry tomatoes in it, and you can see that they must grow in different ways too. The two plants on the right are a lot taller and a lot less bushy, but no less of a tomato plant with its foliage. I need to get some stakes for these two taller plants.

Box 5
My mini cauliflowers are going well. There is the odd brown dying leaf that I can only put down to the storm we had as hey are all they're smaller leaves at the base of the plants.

Box 6
My chives look like they're doing well. They are a nice bright green and getting taller, I just hope that more shoots come up as well or I'll eat it and that will be it.

My beetroot is doing really well. Their leaves are getting bigger and greener. I wish I could see under the dirt though, see if theres any development in the actual vegetable but I guess thats part of the surprise.
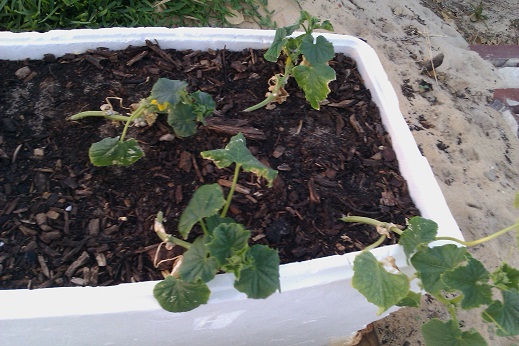
Box 7
This looks like a sad box, mainly because there isn't as much in it, but that is probably healthier for he plants. These cucumbers are looking healthy and have some bright yellow flowers on them, but I forgot to photograph that bit.

Veranda Pots
This mainly means my mint, but when I was watering the mint I also stared watering a pot along side it that had something brown and supposedly dead in it....   but it came back to life!
I'm not exactly sure of what it is, beside some sort of herb (I know I'm bad for not knowing), but Mum will tell me.

This is my mint. It is growing pretty fast so I might be able to use it soon with out taking all of its leaves.

Overall I am extremely happy with how my home kitchen garden is going. It is growing fast and green, and even though I have had a snail I am determined not to use any harmful sprays because I know that there are lots of home remedies to pest problems...  like relocating a snail to the empty block next door (lots of weedy plans bu no house).

Sunday, March 13, 2011

Watering Your Home Kitchen Garden

My Dad said that I should water my plants twice a day while it is warm/hot, once in the morning and once in the evening. To be honest I have been forgetting the morning watering quite regularly, but in the evenings I do remember and sometimes I have a little help from some little people that live with us.

My 4 year old niece, Yassy. 

She's really proud to be watering because most helping jobs go to her brother just because he is older, but she really wants to get stuck into things now that she has started Kindy.

And this is my 8 year old nephew (Yassy's big brother), Zac.

Zac is usually happy to help, but my phone had a delay in taking the photo... he was smiling.


Because Yassy doesn't always get to help in things, I've been trying to make the extra effort in getting her involved. I also know, from working at school that introduced kitchen gardens into the grounds, that if children get involved in growing veges, then they will more than likely eat their veges, or a least give them a go.


She loved that she could look at all the plants before Zac got home from school.

Just a post about how important it is to water, and also about getting kids involved if you have any around. 

Planting / Week 1

I chose to plant my veges fairly close to the house, as I dislike the spiders and snakes and bugs that live among our other plants on the block. Inspired by a Better Homes and Gardens segment on Friday February 25, I used some styrofoam containers we had left over from Crisco.

Step One: Poke some holes in the bottom of the containers for drainage. If you don't do this then the water will stay there and will essentially rot whatever you have put in the pot.

Step Two: Find a place to put your containers before you fill them. Two reasons, one is that they may be very heavy to carry, and two is that the containers may break. You also need to keep in mind that the bottoms of the containers need to be slightly off the ground. If they aren't, then there wasn't much point putting drainage holes in the bottom. I (with the help of Dad) put my containers on a few spaced out beams of wood that we had lying around. Better Homes and Gardens suggested putting pot feet on the corners of the containers. Something like these:

Step Three: Adding your soil. Depending what you are growing, you need to choose different soils. If your growing roses (which are edible so could classify as part of a kitchen garden) you would be better off with soil designed for roses. The same goes with citrus trees. My soil was part black sand and something that smelt really bad, I'm guessing it was some animals manure. Dad actually mixed this up for me and I will need to ask him what exactly it was. I started shoveling it into the containers being careful that the container with beetroot in it didn't have any big lumps of stone, clay or wood in it, otherwise they could turn out a little mis-shaped. After the soil is in you need to water it until water comes out he little holes you made at the bottom. This ensures that all the soil is damp.


That is my Dad lending a hand (he has all the garden know-how)

Step Four: Planting. Really, you should plan your planting out fairly well, but we sort of just put plants where they fitted. I had 7 planter boxes and this is how they turned out after planting:

Box 1: Capsicum

  
Box 2: Lettuces and Cherry Tomatoes

Box 3: Peas (Really not expecting these to survive because of the storm we got on Monday February 28th, they really did look dead)

Box 4: More Cherry Tomatoes

Box 5: Mini Cauliflower

  
Box 6: Garlic Chives and Beetroot (The chives do need to be moved into their own container)

Box 7: Sushi Cucumber

There is also a pot that I failed to take a photo of that has the mint in it.

After planting all the veges out you need to water again. If you have only just watered the soil in then you may not need to but I put the soil in on a Saturday and the plants in on Wednesday March 2, the the soil had dried out but considering the storm we had on the Monday I'm quite glad that most of the little plants weren't subjected to it.

Happy planting!